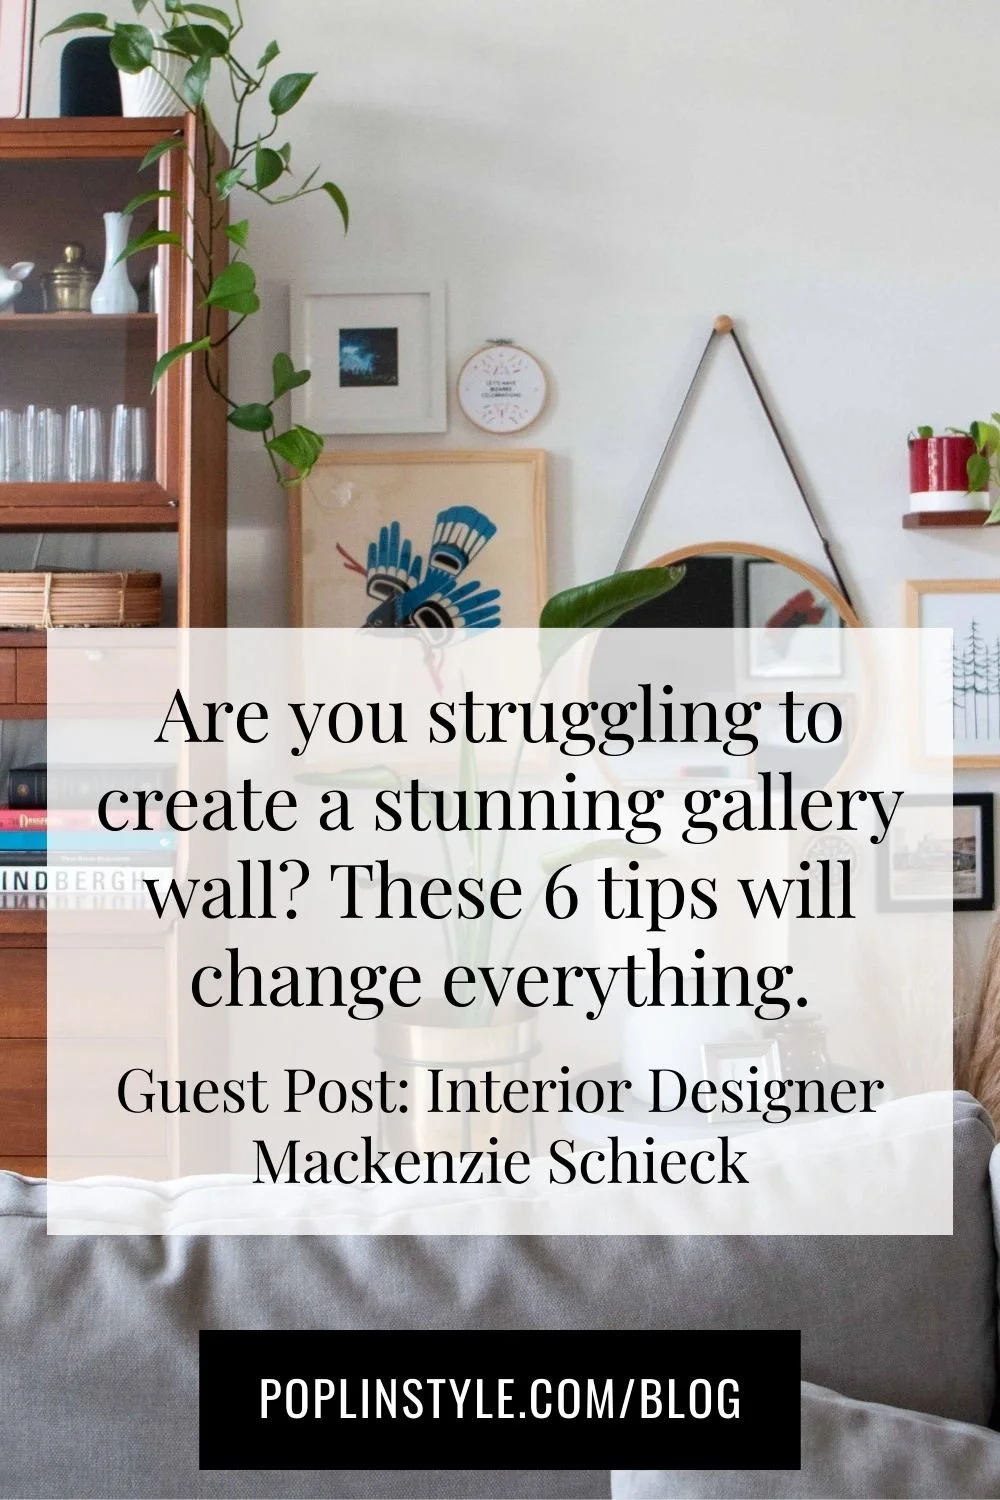
Guest Post: 6 Things I Do To Create A Gallery Wall

As a personal stylist for women based in Seattle, I get an endless number of requests to write guest blog posts. Truly. So. Many. Requests.
I take our relationship very seriously, Dear Reader. You trust me with your time and my commitment is to give you quality content that helps you transform your authentic personal style and feel good about getting dressed everyday. I like to write those myself.
Simultaneously, I absolutely LOVE connecting you with other amazing folks. It’s great for you, great for them and frankly, makes my heart swell, too. You can find several of these guest posts in the In It Together Series that we launched in early lockdown.
A friend introduced me to Mackenzie Schieck and it was love at first coffee. Before me met, I was enamored with her design and specifically her fresh perspective on hanging a collection of photos on a wall. Seriously. I was transfixed. Fortunately, she agreed to share that innovative approach with the Poplin community in the blog post below. I expect you’ll be bookmarking this one- or pin it on Pinterest! I hope you adore it as much as I do. Have fun with it and as always, let me know what you think. -Mellicia
In my 20 years of working as a creator in food and interiors—whether as a writer, photographer, stylist, or interior designer—one thing that has never gone out of style is creating content about how to approach a gallery wall. I’m sure you’ve read many-a how-to article, gone down a Pinterest hole or two, or been sucked into any number of Reels. And I really believe this is because there are SO many ways to go about creating a gallery wall, and it’s fun to see how other people approach them.
But what’s great about gallery walls (yay, so many options!), can make them a little intimidating (yikes, so…many...options). The good news is that I really believe it’s all about finding the style that’s right for you, as opposed to finding the “right” style. Some are a bit more random and haphazard, and others are all about precision and order. I think my style is somewhere in between. So that’s what this blog post is—six things I’m always keeping in mind when creating a gallery wall, that will hopefully give you little inspiration and help you find your style! Okay, here we go…
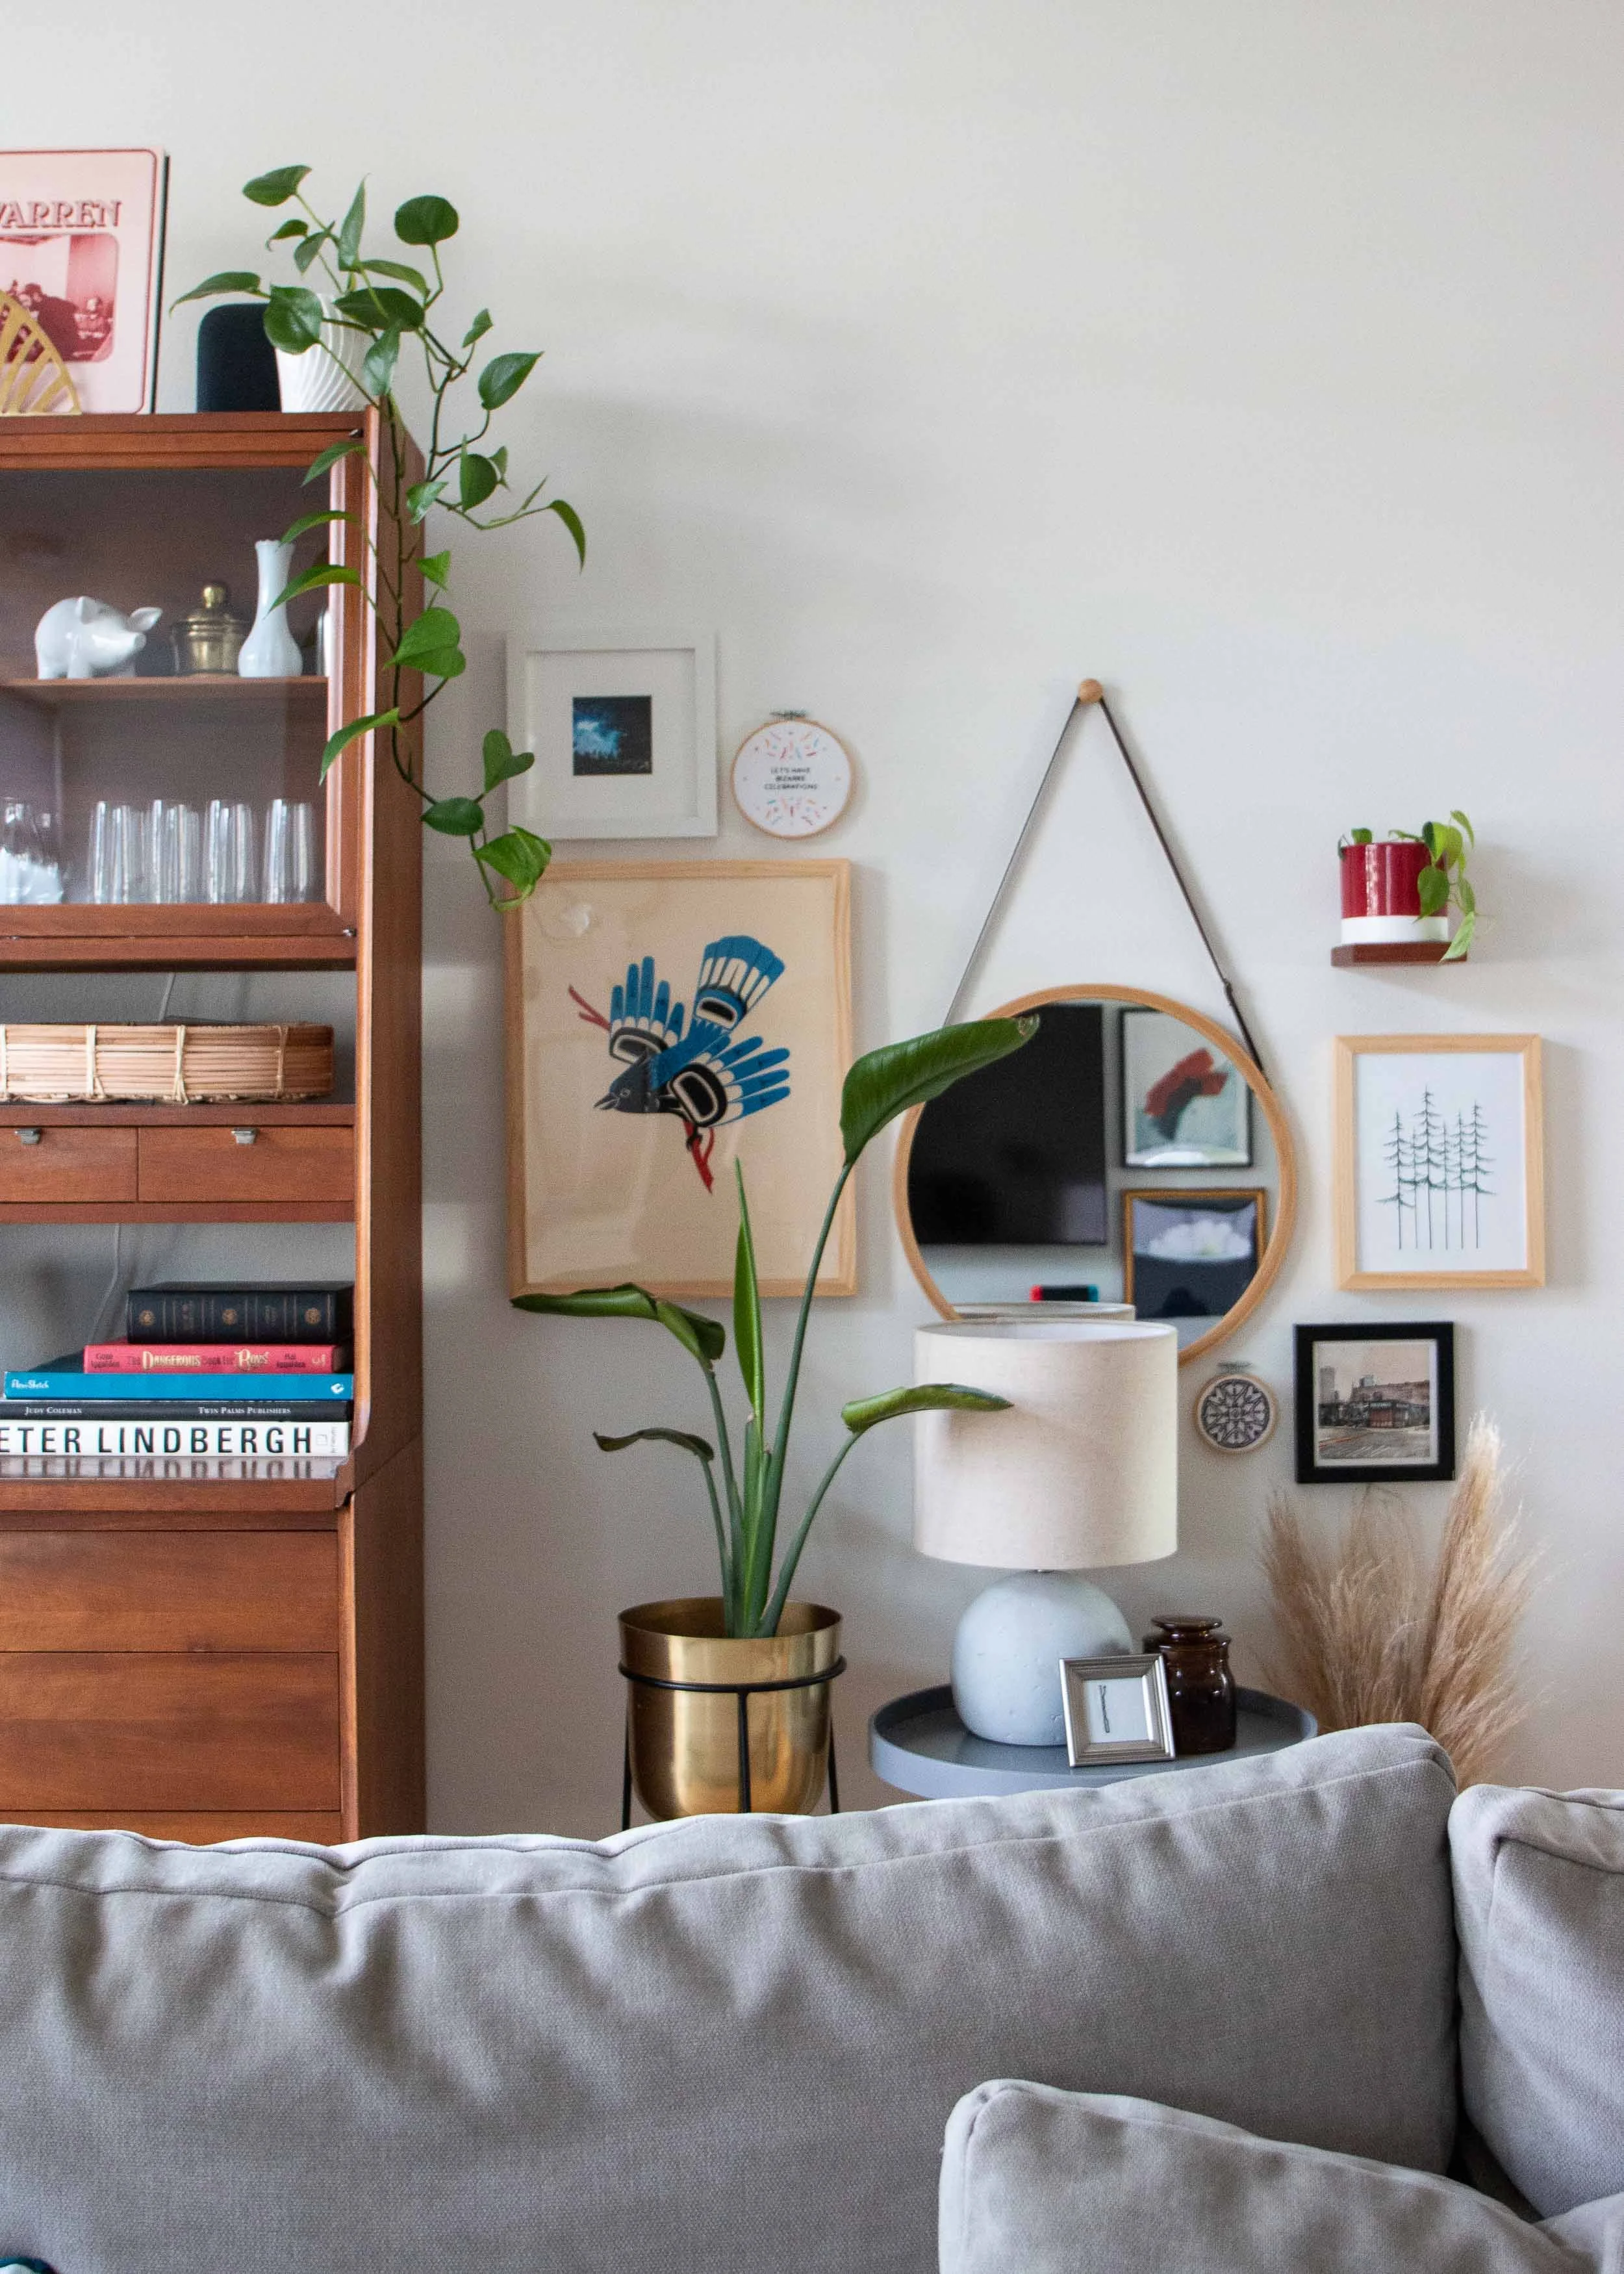
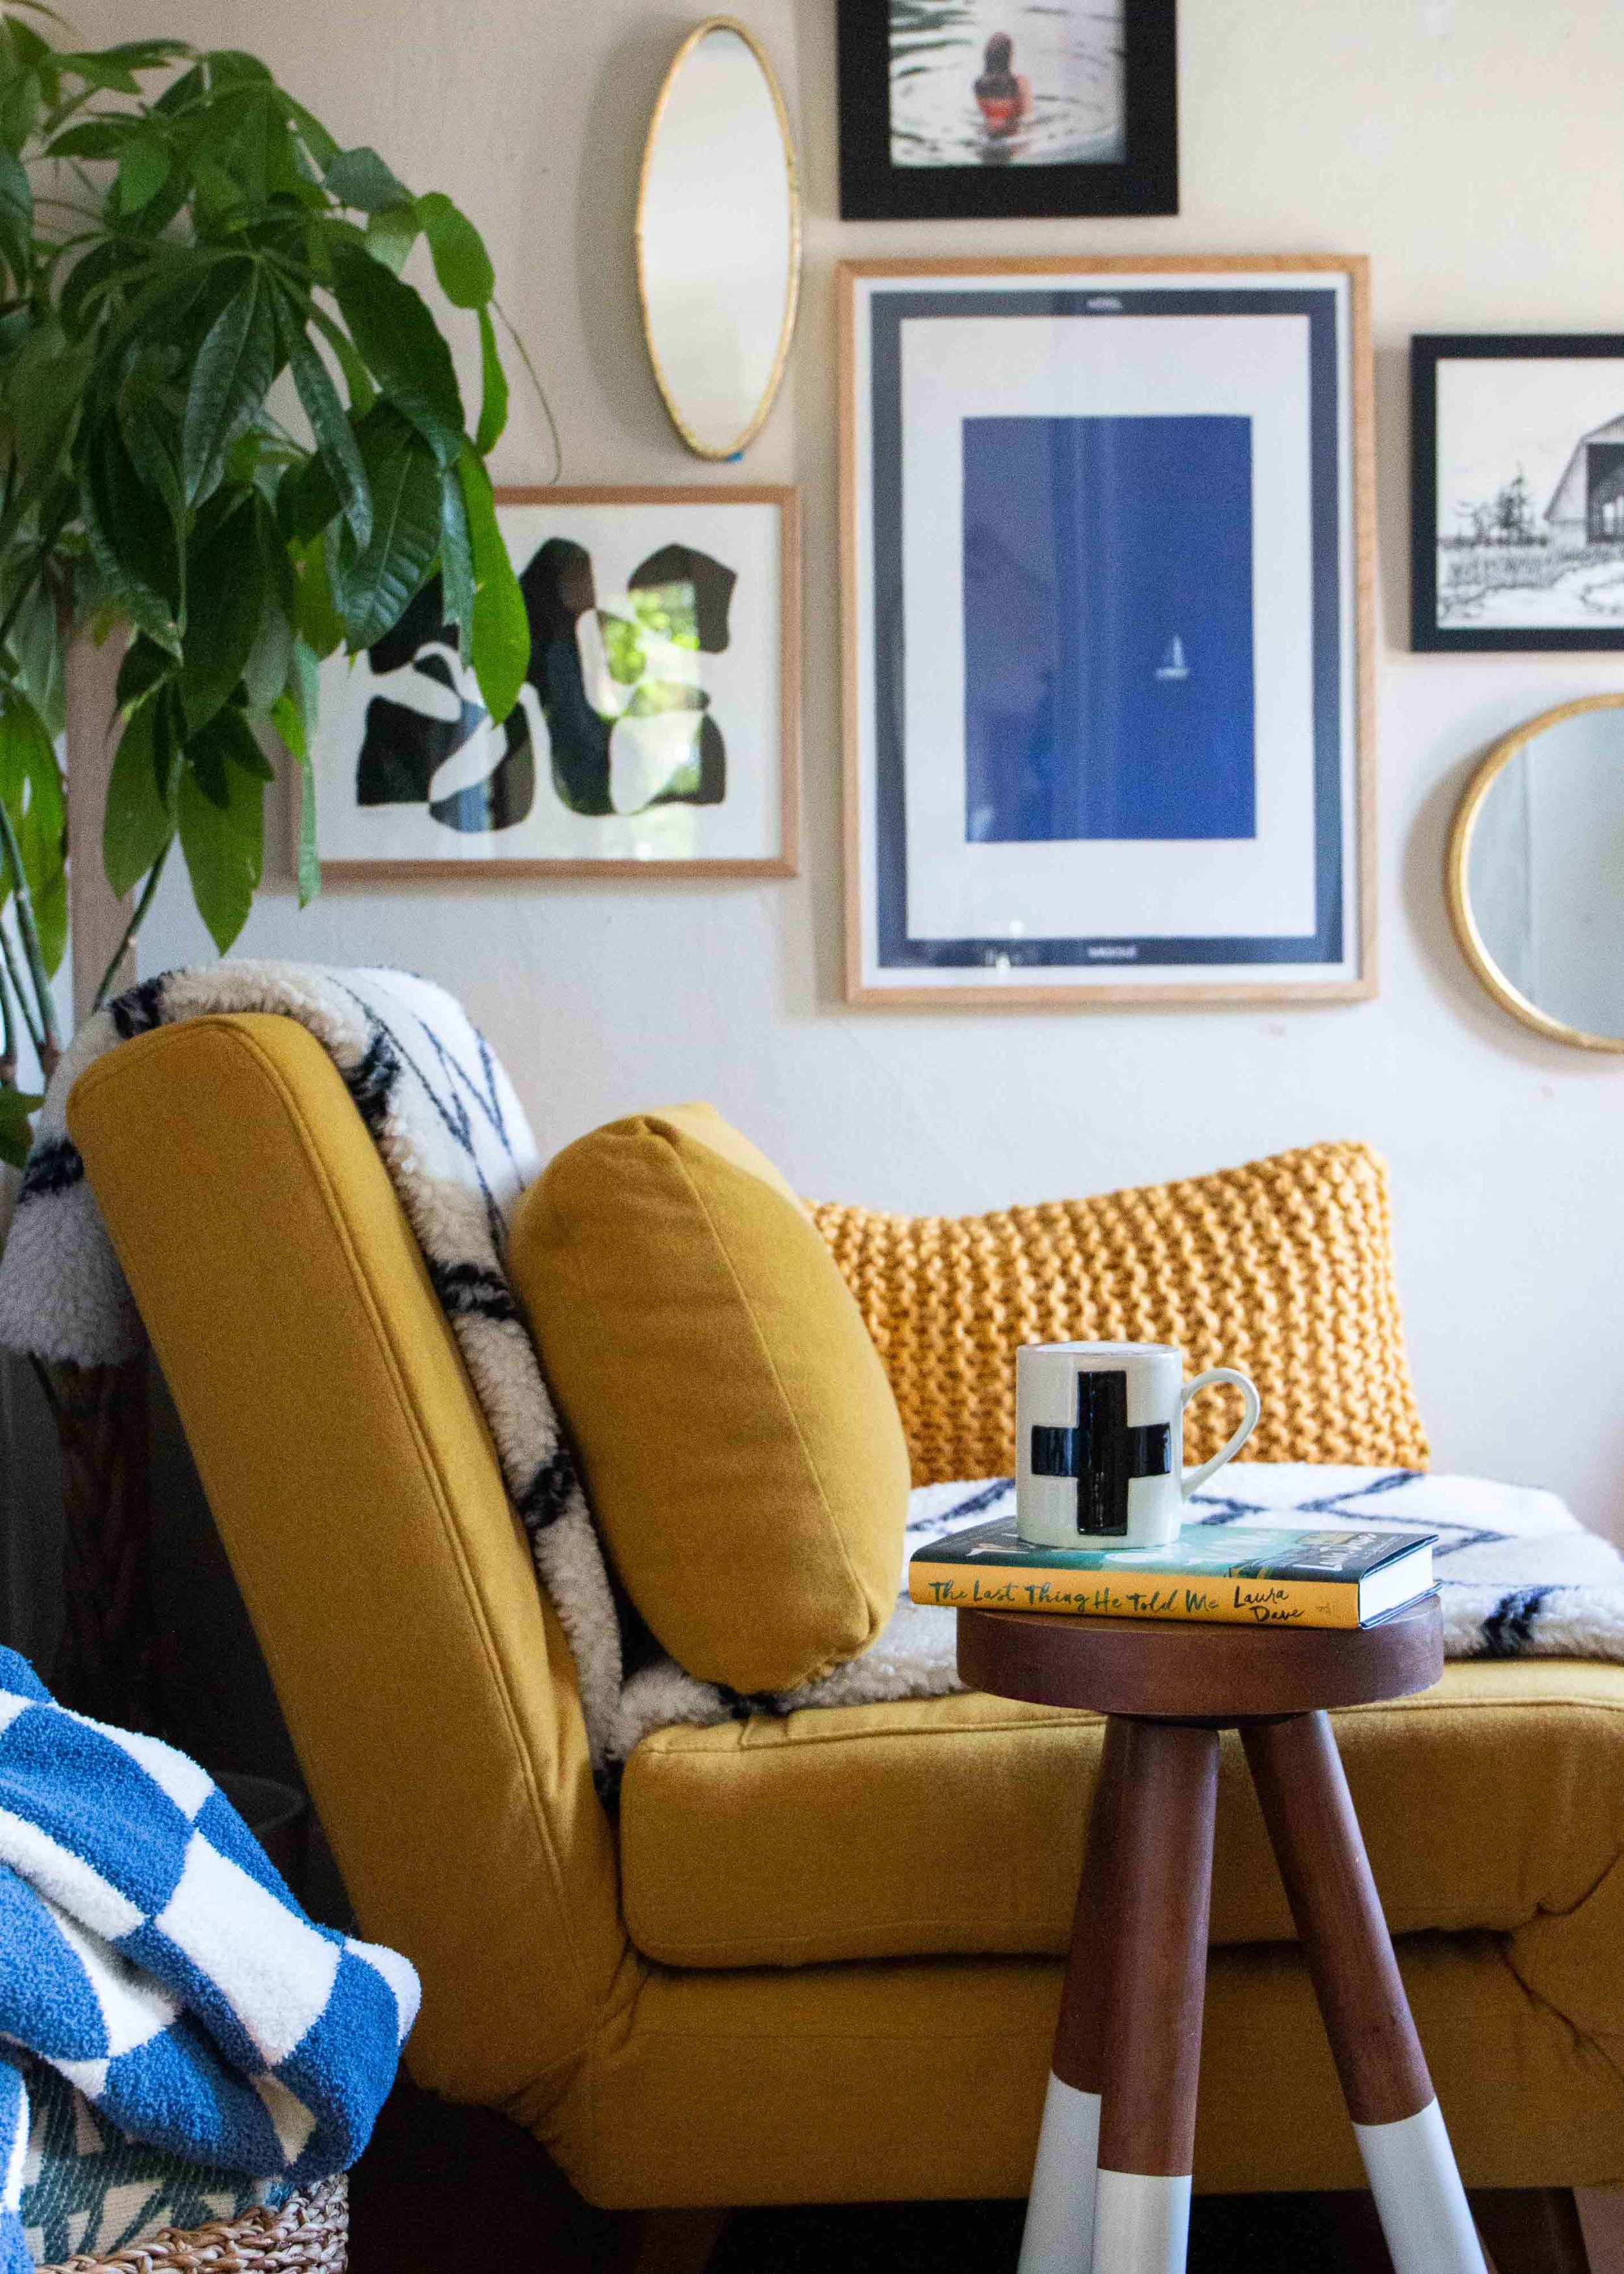
1. Use a good mix of horizontal and vertical pieces
Simply put, I just like how this looks. I find that having a good mix between the two frame orientations gives the gallery wall a more dynamic look so it doesn’t get too grid-y. (Though, I don’t hate a grid if done intentionally.) And when I’m putting it all together, it makes creating a balanced configuration so much easier than if you only have one or the other. And speaking of balance…
2. Focus on balance instead of symmetry
Occasionally I find symmetry satisfying, but more than anything else, I’m really just trying to create a gallery wall that feels visually balanced. So, what do I mean by that? A few things, actually…
One element of finding visual balance is considering the physical space the art takes up on the wall. So, let’s say we were to slice this gallery wall down the middle…

And then we Tetris the pieces of each side together…

I like for those two halves to form roughly the same size rectangle. To be clear, I don’t actually do this slicing and dicing exercise when I’m creating a gallery wall, but I am eye-balling things with this in mind as I’m arranging pieces.
Another element of creating visual balance is taking into account the “weight” of elements in the art. When I’m creating a gallery wall, I’m always considering how space is being taken up (or not) by the subject of the art. Some pieces of art are very “heavy” with elements in the frame, and some are “light.” Heavy pieces fill the frame with saturated color like in these pieces:

And “light” pieces have a lot of empty space with no—or very lightly-saturated—color like in these pieces:

So, when I’m putting together a gallery wally, I tend to put pieces together that have a balance of light and heavy:

The third and final element that I keep in mind when creating a visually balanced gallery wall, is the visual weight of colors. I tend to make sure similar colors in a gallery wall are dispersed a bit. For instance, these three pieces all had greens so I wanted those broken up a bit. (And the two with black lines in them are also mostly separated.)

3. Include non-art elements
I use this as both an intentional plan and as a hack when I can’t get frames to come together just right. For example, if everything is perfect except there’s one blank spot that needs filling, enter: a hanging plant! But also, in general, I love a mirror, floating shelf, pendant lamp, or other random item incorporated into a gallery wall. Here are a few examples:
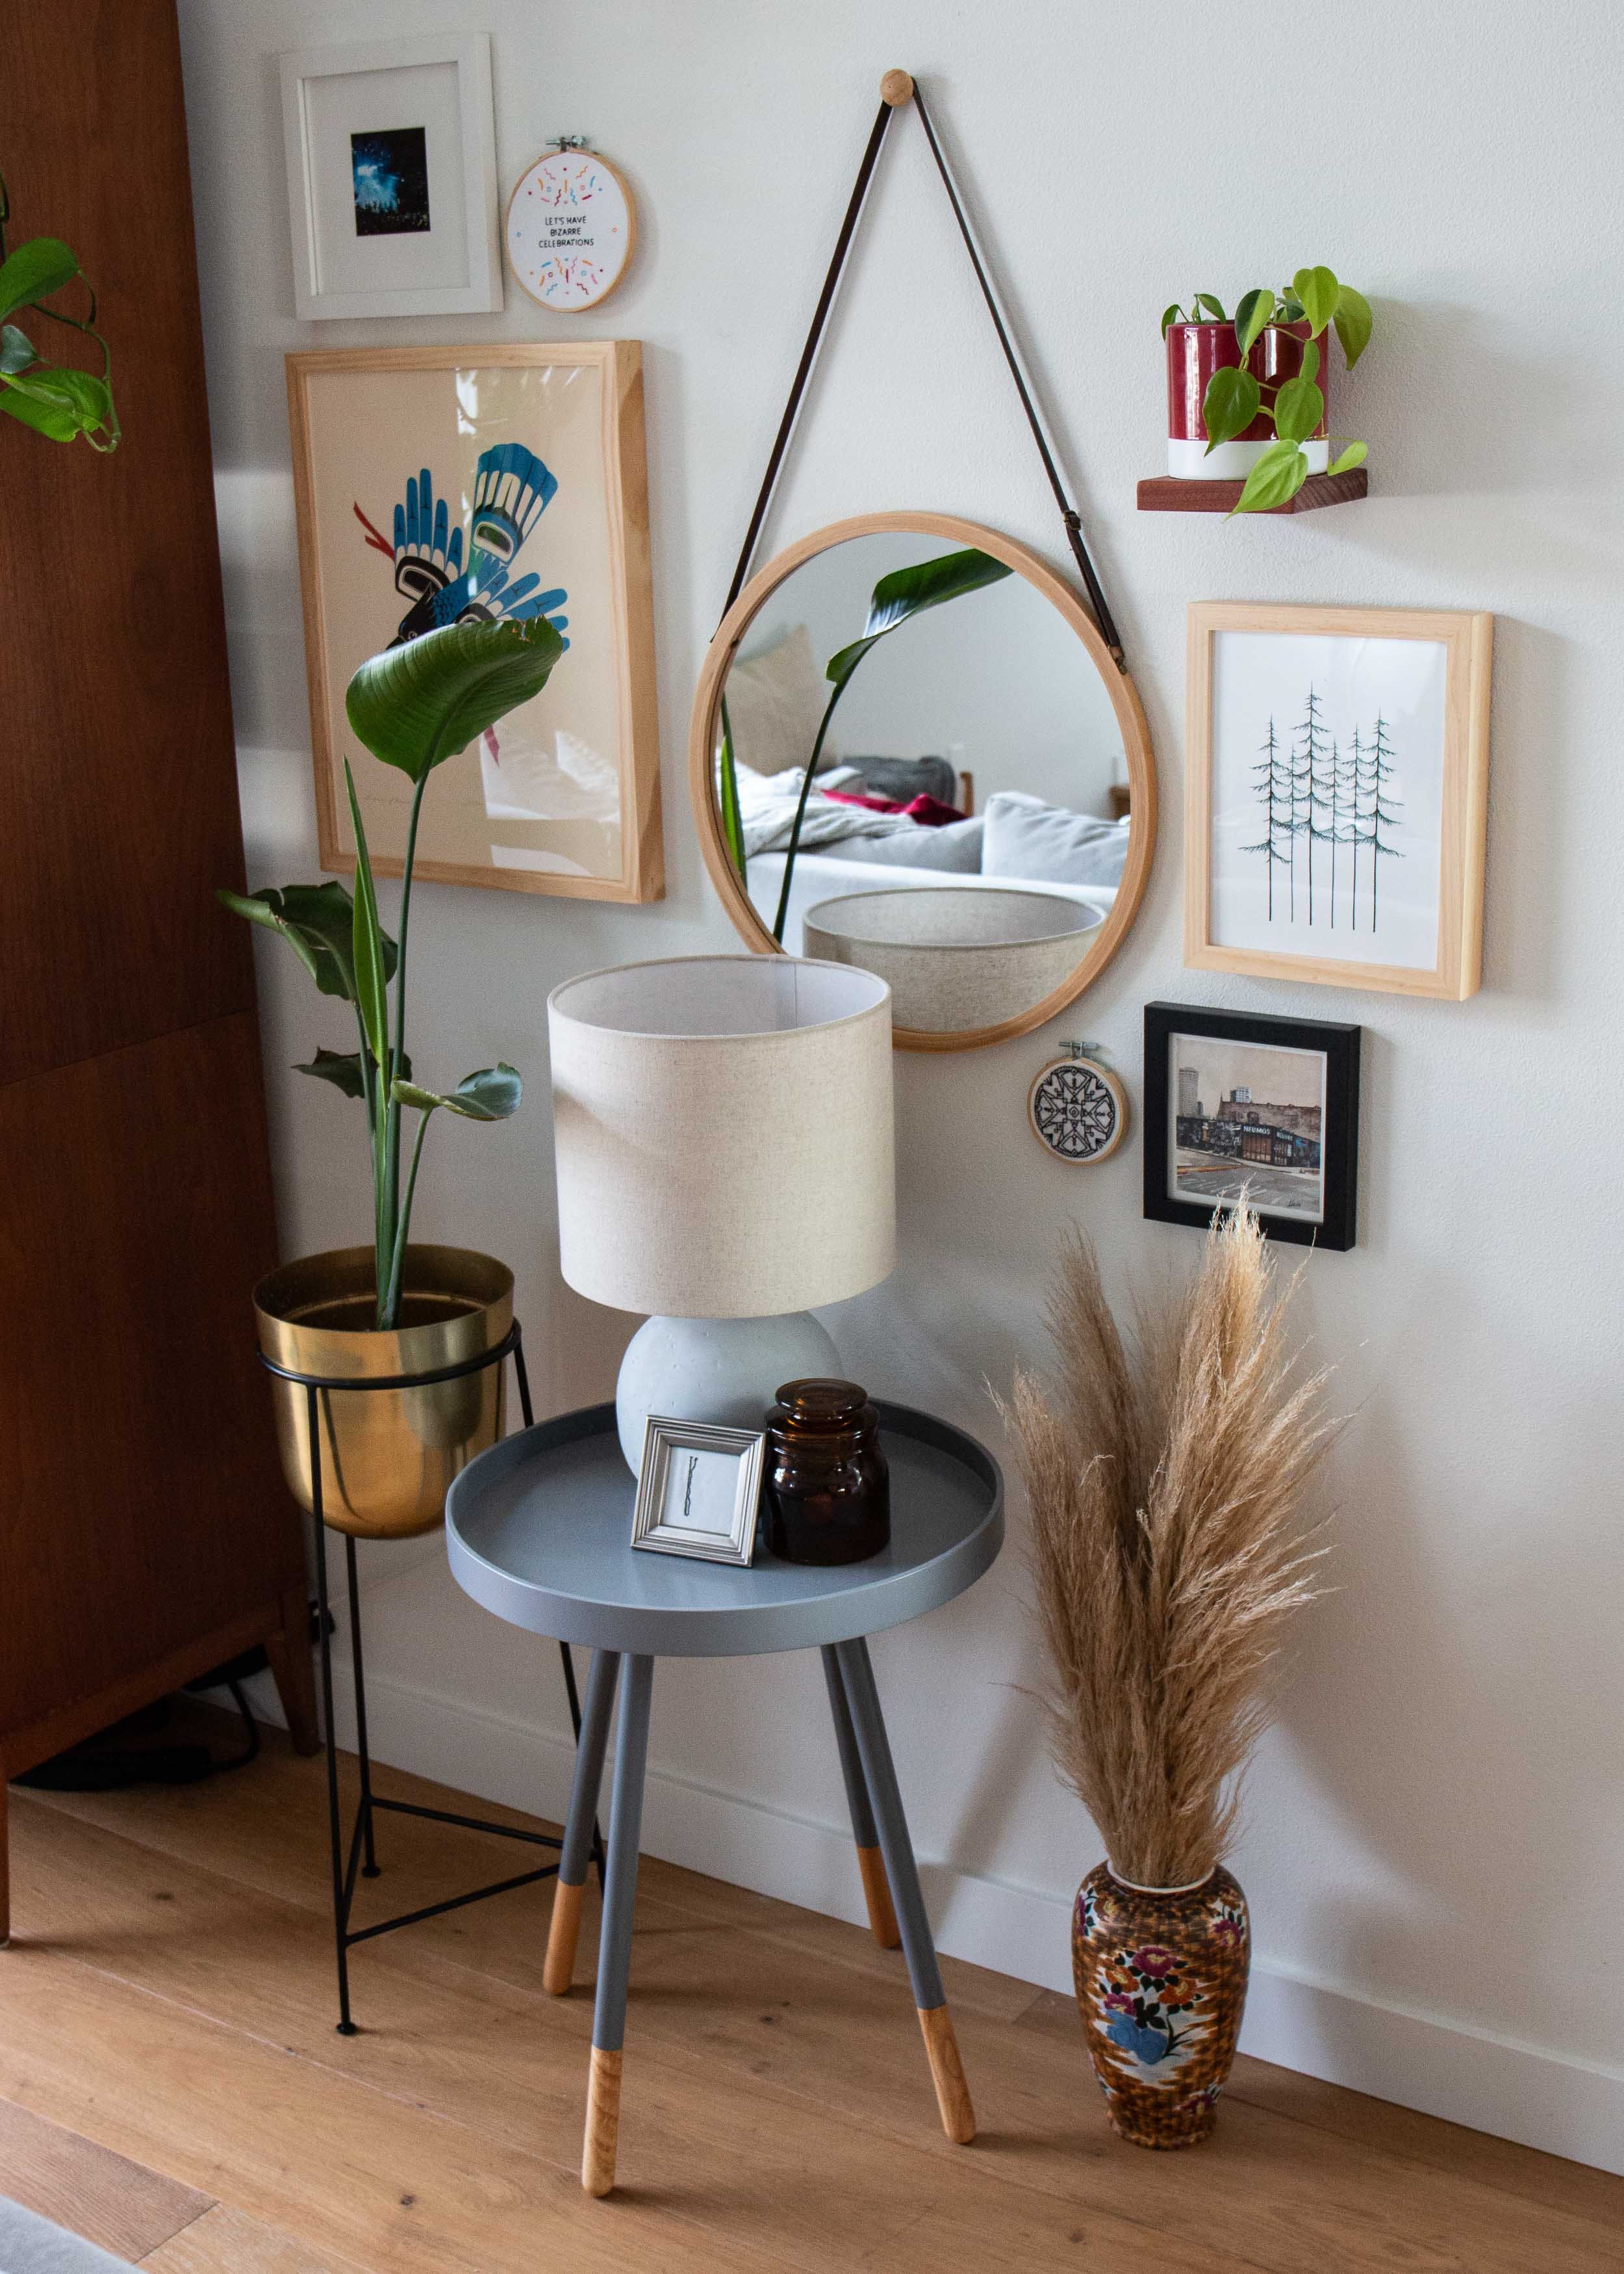

4. Work around furniture
When you’re placing art with furniture, I know the default move is to arrange the pieces above the furniture (e.g. with a couch or counter-height table), but I love arranging it around it—almost as if the piece of the furniture is another piece of art, like these:
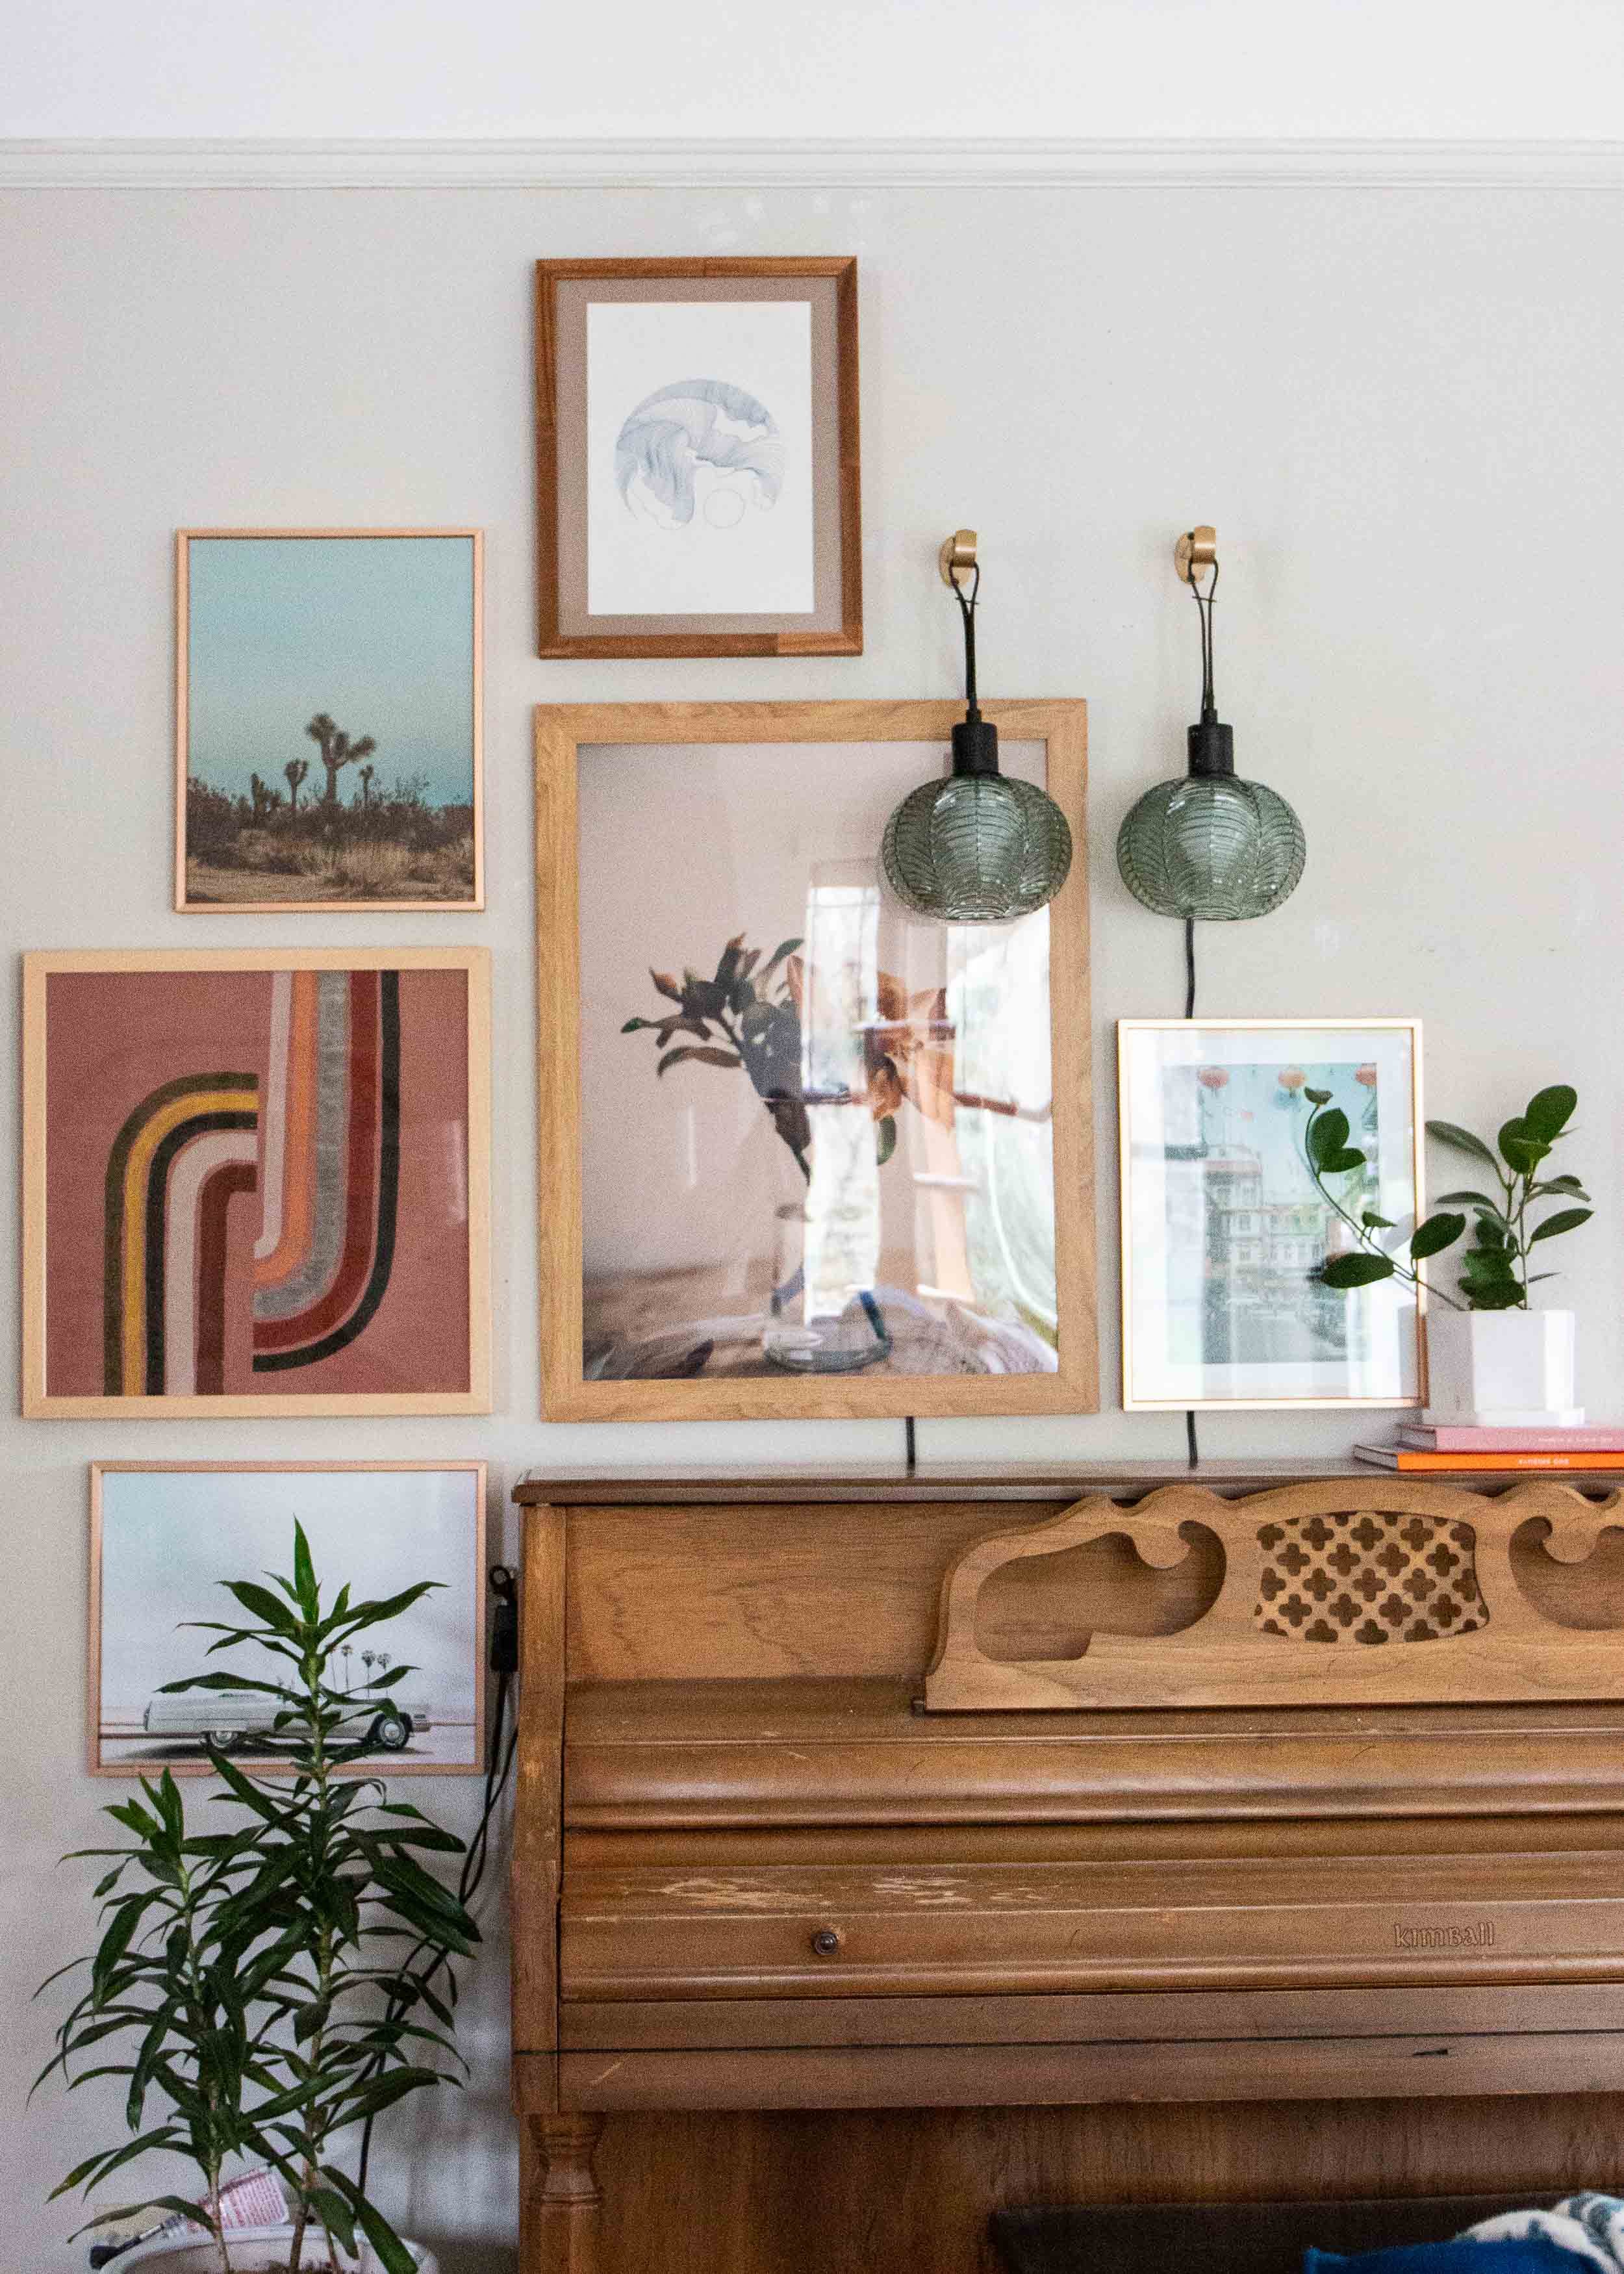
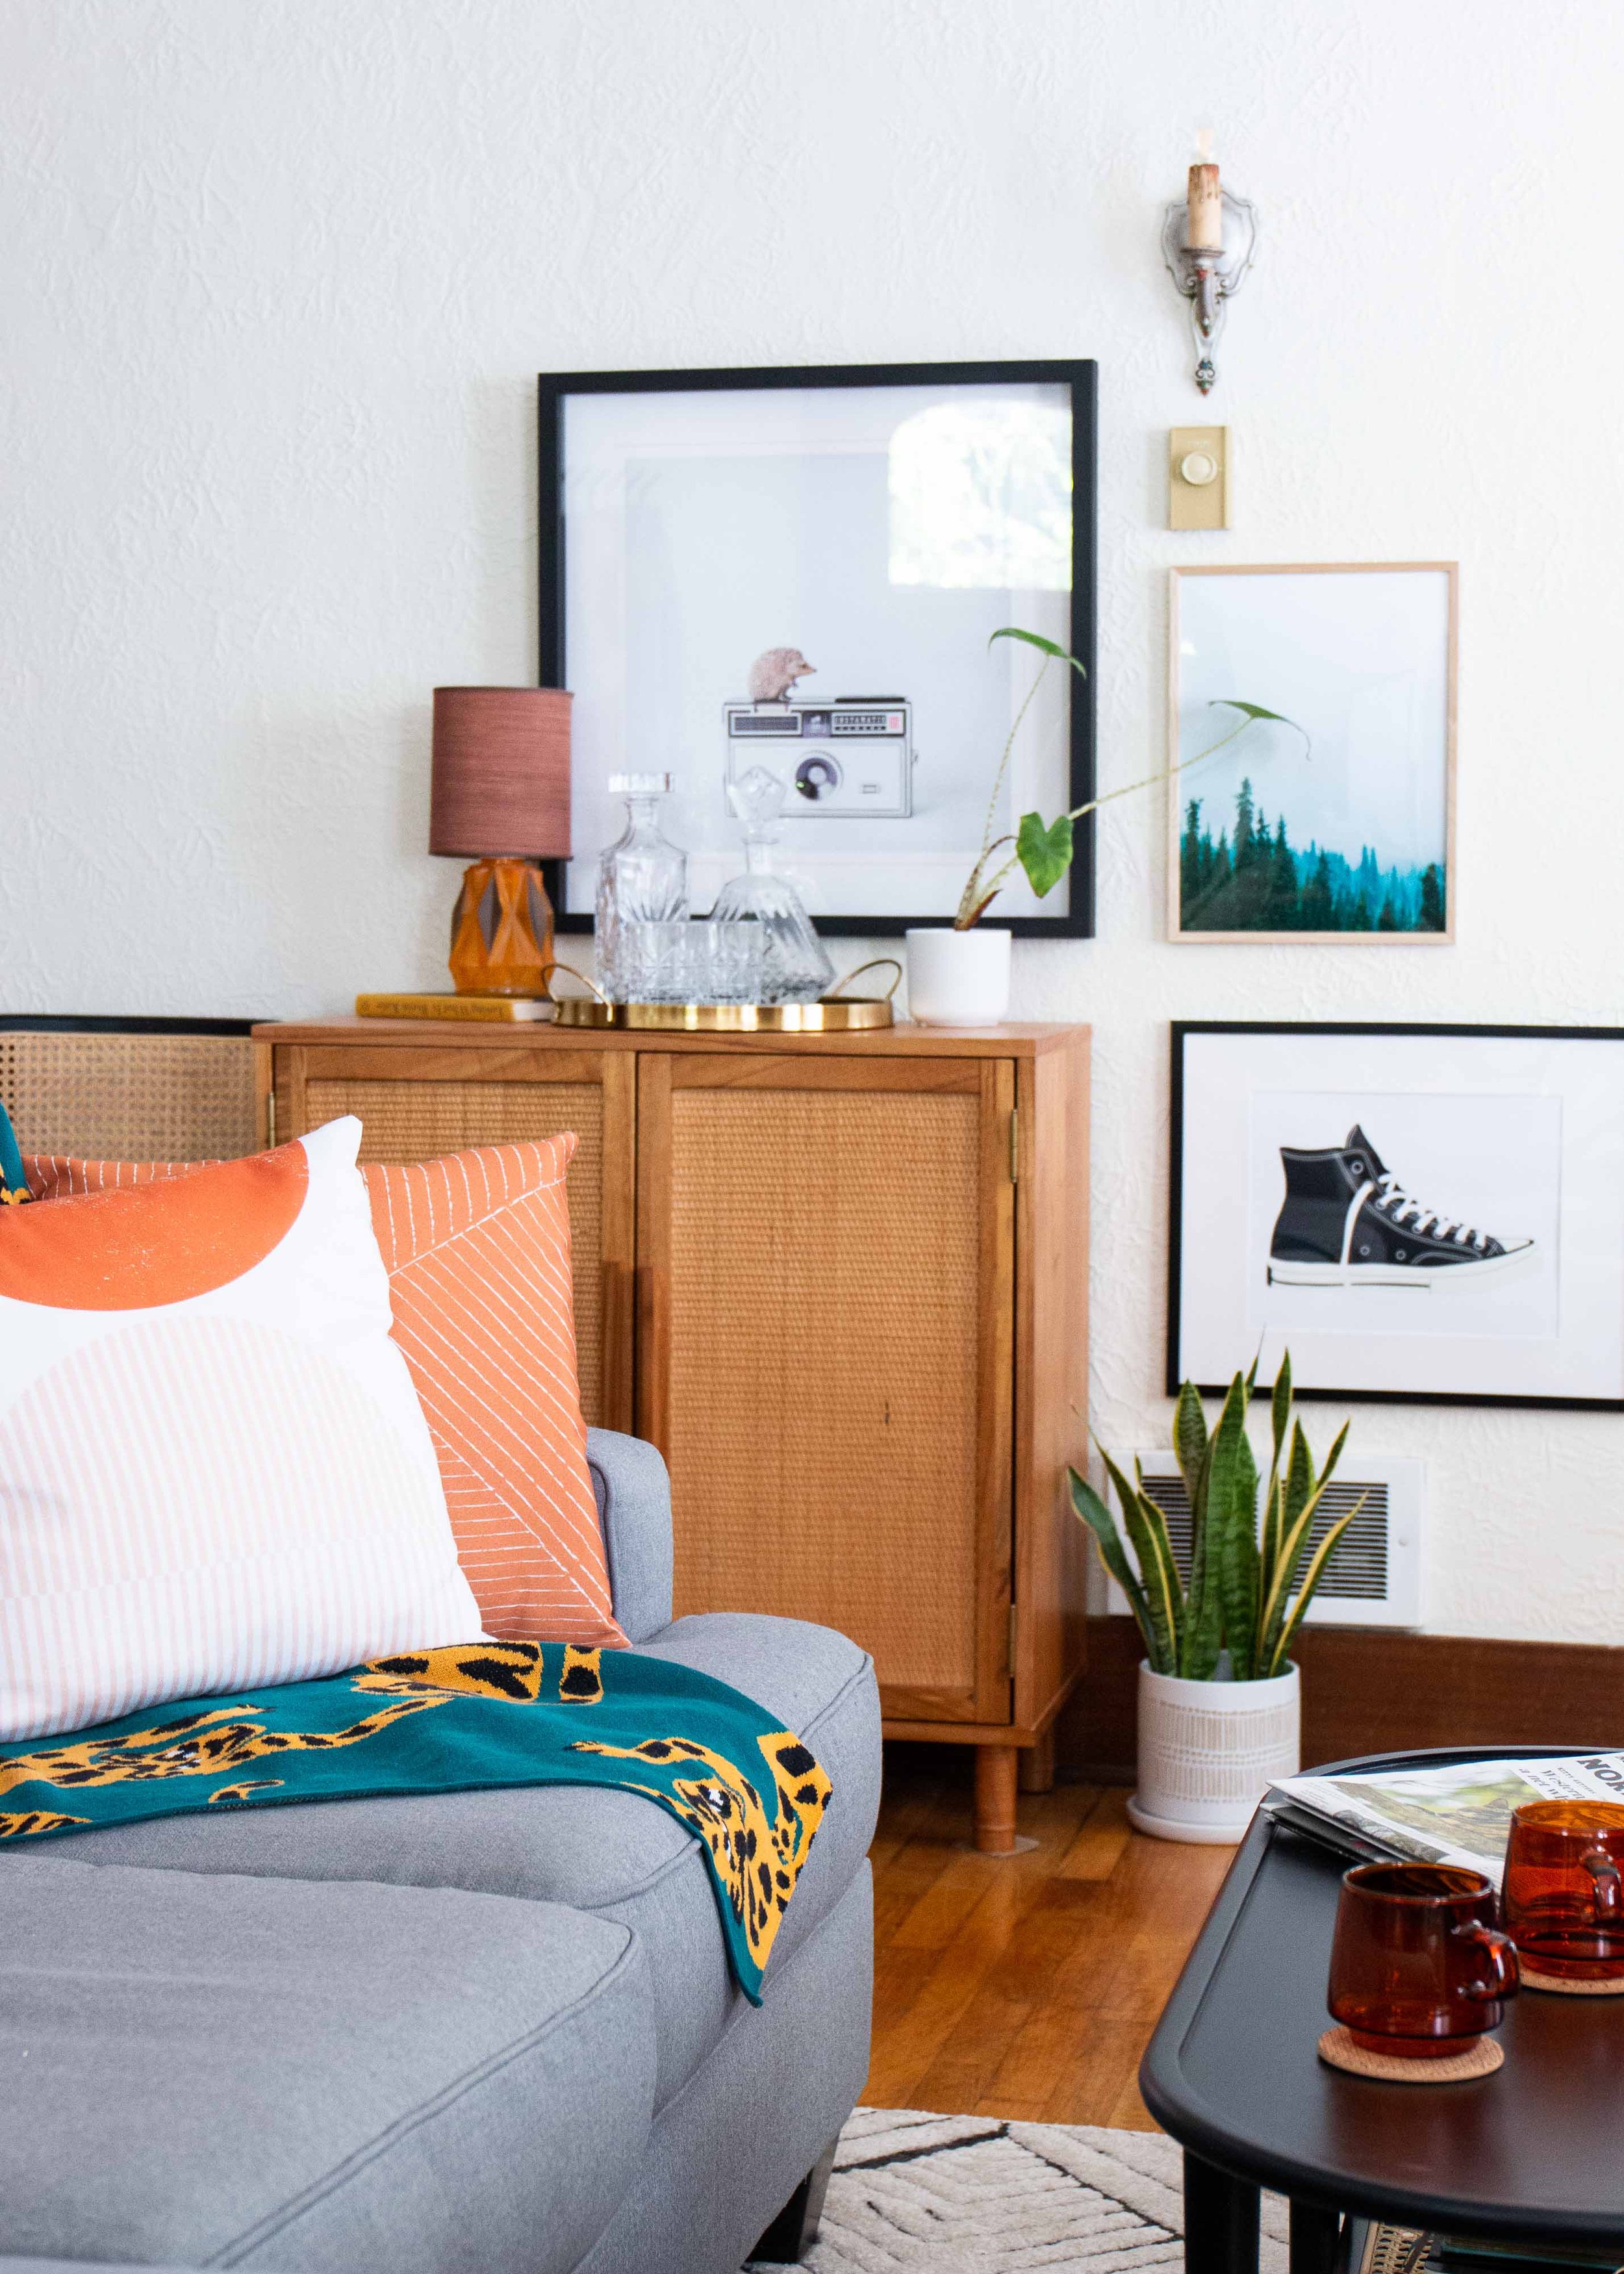
5. Use consistent spacing
Part of the fun of gallery walls is that they don't have to be perfect. We’re not necessarily doing matchy-matchy colors, all the pieces are different sizes, frames can be different depths, etc. But one way I do like to bring a little bit of order to things is by making sure all art pieces have the same amount of spacing between them. (I find 1-2 inches is a good amount of space for most gallery walls.)
6. It works > it matches
If I think back on how all of my gallery walls came together, I usually started with two or three pieces of art I LOVED, but that didn’t necessarily match. I am firmly of the belief that if you really love something, get it, because even if it doesn’t “match,” there’s usually a way to make it work. And I don’t mean that as a concession! If you’re an old school Project Runway fan, you know that when Tim Gunn would encourage fashion designers to “make it work,” he wasn’t saying, “make it adequate”—he was saying, “make it amazing!” And making it work is just about following the principles above to bring it all together.
And there you go! My not-so-secret-sauce to creating a gallery wall. In terms of logistics, I like to lay all my pieces out on the floor, then take a picture to reference as I start hanging things on the wall. I recommend starting with the most “middle” piece of art, and build out from there. If you’re on Substack, I recently wrote a post that includes an easy way to save money on art (I’ve saved hundreds this way!). Have any other questions? Follow me on Instagram and shoot me a message.
Also, I have a discount*, just for you! If you’re in need of a spring home refresh, Fill out this quick form, mention this blog post, and I’ll give you 20% off your first 20 hours of interior design and/or styling services. Hope to hear from you!
*Discount available through May 31, 2024.

Mackenzie Schieck has been in the food and lifestyle industry for nearly 20 years, and is the owner of Schieck Spaces, a creative studio specializing in food and interiors. Whether it’s been as a writer, stylist (food, props, and interiors), or photographer, she has contributed to brands like Apartment Therapy, Allrecipes.com, Amazon Home, and more. She’s also been providing interior design help to Seattle residents (and beyond!) since 2021, transforming apartments and houses into spaces that really feel like home. Mackenzie is a PNW native, waterview enthusiast, and has made it her personal mission to say hello to all the cats. (All. Of. Them.)
Pin This!
Come on In!
Holy crow there are a lot of benefits to being a member of the Poplin community. You’ll receive my Top 100 Favorite Retailers Organized by Personal Style AND the Wildly Popular Six Weeks of Style Tips. Poplin email subscribers also get the newsletter directly to their inboxes every other Friday PLUS all sorts of bonus content that is not published on the blog. Sign up! We won’t spam you or share your info with anyone else. Already on the list? Share Poplin with a friend who’d love this content, too!
